Wednesday 8 December 2010

Christmas Present DIY

Ruby's quick & easy
DIY Christmas present guide.... 
A Scrabble Brooch.
Here I'm going to show you how to make a little Christmas for
someone {or a treat for yourself}. It's very very very easy
to do and needs no skills except threading a needle.

You will need- some strong glue, some ribbon of your choice, a safety pin,
a needle and thread and an old Scrabble piece

Step One- Squeeze some of your strong glue into
the middle of your scrabble piece.

Step Two- Tie your piece of ribbon into a bow then stick it on your
scrabble piece, hold them together for a little while until you feel they
are firmly stuck together. You might want to then leave this for an hour or
so just to make sure that the glue has properly dried, but this isn't essential.

Step Three- Next you thread your needle. Use a thicker thread
{eg embroidery thread} to make it more secure. Do a single stitch in
the centre of the bow, then place the safety pin where you want it to
be fastened on your badge. Put your needle through the pin and tie a
knot so it stays in place. Then you loop the thread through a few times
as if sewing on a button. Finish off the stitch and make sure the pin
is held securely in place and won't fall off.

Now you are finished! You can decorate it more if you want, you could sew on sequins, add glitter glue etc. I hope my instructions were easy enough to understand! Please leave any comments you have.

love ruby xox

My first homemade cushion!


Here's a cushion I made for a textiles lesson last year, I really enjoyed it,. It was one of my first proper sewing projects, so it's not brilliant. It's got little bells on all four corners, the writing saying 'little bird' had to be handstitched because the sewing machine that did the writing broke, I didn't take any photos, but the back is gingham and to hem it I used a stitch that was lots of little hearts joined together..super cute ©

love ruby xox

Monday 29 November 2010

i heart polaroids

Over the past couple of days I've been working on stitching a little Polaroid camera. I don't think you'd call it embroidery would you? I'm not really sure actually! I drew a simplified Polaroid camera on a bit of scrap material then stitched over it with embroidery thread. Here are a couple of photos...


There a bit untidy, I need a bit more practice! p.s. I used my favourite vintage dress as the 'backdrop' cause I love the pattern of it!

love ruby xox

Friday 19 November 2010

Rainy days...

For the past week it has just been rain, rain, rain. Sometimes the rain is super fun but at other times the rain just seems grey and I feel a little bored stuck inside. When I'm in a warm house or in a cosy tent, watching or listening to the raindrops on the windows, or having a cosy evening in scrapbooking or watching a movie I really love the rain. All the recent raininess inspired me to do this blog post. Here's to the rain! ©

A few pretty things with a rain weather use or theme. Enjoy! From left to right-umbrella, purse, scarf, necklace, rubber stamps, flask, parasol umbrella, umbrella, brooch, coat, charm bracelet, wellies.


A film for a rainy day/evening snuggled in
a blanket and one of my favourite films too!


©A little craft project-

You will need a jar {a jam jar would be perfect,
I used a jar from a jar of vintage-style sweeties!},
tissue paper of any colour you would like,
a thick black pen, ribbon, glue & pennies.

This little project is super easy, it doesn't take very long at all! First you clean out the jar and take the label off the jar {if there is a label on your jar}.Next you write your phrase on a sheet of coloured tissue paper, I chose to write 'save your pennies for a rainy day as this suited the weather at the time and it's a cute phrase too! You can add little doodles, sequins or little decorative things like that to make it pretty, it's up to you what you do. Then you cut out your phrase, but make sure it fits on your jar! Then you glue it on, another idea would be to tape it on with the pretty patterned sticky tape you can get in crafty shops. When you have done that, all that's left to do is to tie a ribbon around the top of the jar for added cuteness. Don't forget to put all your spare pennies that you find in your jar! If you want your penny jar to look super smart you can clean your pennies before putting them in, learn how to do this here. xox


hope you enjoyed my rainy day post!
love ruby xox

Wednesday 17 November 2010

My attempt at jewellery making...


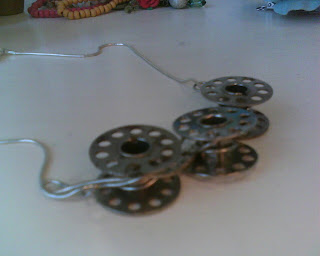
For christmas last year I received some jewellery making wire and I haven't really used it up until now. I made a tape-measure bracelet out of, you guessed it, tape measure and the wire to make the fastening. The other day I made a necklace out of some old metal bobbins, the wire and a necklace chain of my sister's that she gave me to use. I wound the wire round the bobbins then attached it to the necklace chain. I think I need to practice jewellery making a bit more, my necklace doesn't look very professional! I enjoy making my own jewellery though and I make a lot of my hair accessories too.

love ruby xox


Tuesday 16 November 2010

Outfit ideas-a weekend in London


I just love going on long weekends to London with friends or family-it's super fun! Here I've put together a couple of outfits that I'd just looove to wear on a weekend trip to London, hope you like it!

Saturday outfit-dress, cardigan, tights, shoes, necklace
Sunday outfit-glasses, t-shirt, jacket, skirt, tights, boots, necklace
Luggage-bag, camera

love ruby xox